The most prolific creators on social media share a secret that has nothing to do with talent, luck, or having a team behind them. They batch their content. They sit down for a few focused hours, produce a week or two of posts in a single session, schedule everything in advance, and then spend the rest of their time engaging with their audience, refining their strategy, and living their lives. They are not chained to their phones every day, frantically creating something to post before the algorithm forgets they exist.
Content batching is not just a productivity hack or a time management tip you can ignore. It is the only sustainable way to post consistently across multiple platforms without burning out within the first few months. Creators who try to produce content one piece at a time, every single day, inevitably hit a wall. Their quality drops. Their enthusiasm fades. Their posting schedule becomes erratic. And the algorithm punishes inconsistency more than almost anything else.
This guide breaks down exactly how to set up a batch creation workflow that works, whether you are a solo creator managing one account or a business owner posting across seven platforms. You will learn the five-phase framework, how to choose a batching cadence that fits your life, the tools that make the process smoother, and how to avoid the mistakes that derail most batching attempts.
Key Takeaways
- Content batching means grouping similar creative tasks into single focused sessions instead of spreading them across every day of the week, eliminating the productivity-killing effects of context switching
- A complete batch workflow has five phases: Strategy and Ideation, Caption Writing, Visual Content Production, Editing, and Scheduling — each designed to keep you in one creative mode at a time
- Weekly batching (3-5 hours per week) works for most creators posting 3-7 times per week, while biweekly or monthly sessions suit those with less predictable schedules
- The scheduling phase is where batching pays off most — loading everything into a cross-posting tool and setting it live across platforms turns hours of daily publishing into a single 30-minute session
- Start with 5 posts in your first batch, not 30 — scaling up gradually prevents overwhelm and helps you refine your process before committing to larger sessions
- Always leave room for spontaneous content — batching handles your planned posts, but real-time reactions to trends and timely events should still happen organically
What Is Content Batching and Why Does It Work?
Batching means grouping similar tasks together and completing them in a single session instead of spreading them across multiple days. Instead of writing one caption, filming one video, and designing one graphic each day, you write all your captions on Monday, film all your videos on Tuesday, and schedule everything on Wednesday. The process separates the creative modes so your brain can stay in one gear at a time.
The reason this works comes down to cognitive science. Context switching — the act of moving between different types of tasks — kills productivity. Research from the American Psychological Association has shown that switching between tasks can cost as much as 40% of productive time. Every time you shift from writing mode to filming mode to editing mode to publishing mode throughout a single day, your brain has to reload the mental context for the new task. Each switch costs you time, energy, and creative quality.
Batching eliminates those switches. When you sit down to write captions, you stay in writing mode for the entire session. Your brain warms up, finds its rhythm, and produces better work faster the longer you stay in that mode. The same applies to filming, editing, and every other creative task in your content workflow.
How Does Batching Differ From Just Planning Ahead?
Planning ahead means knowing what you are going to post. Batching means actually creating it all at once. Many creators confuse the two and end up with a beautiful content calendar but nothing created in advance. The calendar tells you what to post on Thursday. Batching means Thursday's content was created, edited, and scheduled last Monday alongside the rest of the week's posts.
The distinction matters because planning without batching still leaves you doing daily creation work. You have a plan, but you are still context switching every day. True batching means the creation is done in concentrated sessions, and the days between sessions are spent on engagement, community building, strategy, and rest.
Who Benefits Most From Content Batching?
Content batching works for virtually everyone who creates social media content, but certain groups benefit disproportionately:
- Solo creators without a team — When you are the strategist, writer, filmmaker, editor, and social media manager all in one, batching is the only way to stay sane. It gives structure to what would otherwise be an endless daily grind
- Business owners managing their own social presence — Social media is important but it is not your entire job. Batching compresses the work into defined sessions so it does not bleed into every hour of every day
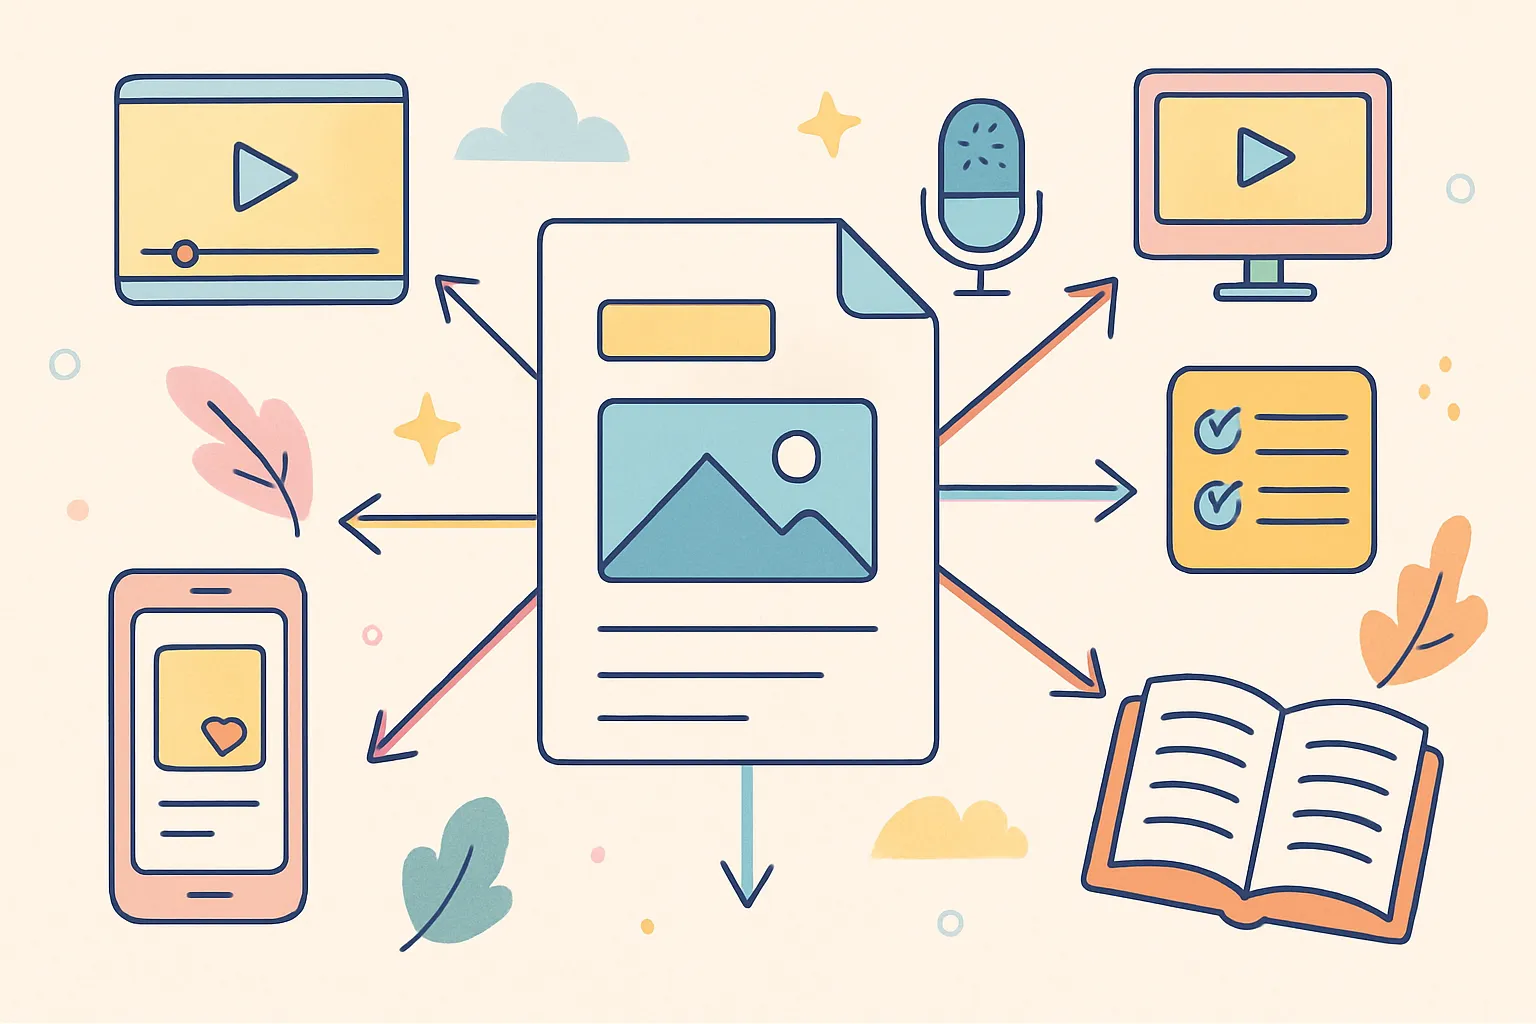
- Creators posting across multiple platforms — If you maintain a presence on Instagram, TikTok, YouTube, X, Threads, and Pinterest, creating platform-specific content daily is physically impossible. Batching lets you produce a core batch and adapt it across platforms in one session
- Anyone prone to creative burnout — Daily content creation is exhausting because it never stops. Batching gives you defined "on" periods (creation sessions) and "off" periods (everything else), which is psychologically healtheir and more sustainable
- Creators with inconsistent schedules — Freelancers, parents, people with demanding day jobs — if your week never looks the same twice, batching lets you capture your productive windows and use them efficiently
What Is the Five-Phase Batch Creation Framework?
A complete batch workflow has five distinct phases. You can spread them across separate days or power through them in a single marathon session — whatever fits your schedule and energy levels. The key principle is keeping each phase separate so you stay in one creative mode at a time.
Phase 1: Strategy and Ideation (30-60 minutes)
Start here. Do not touch a camera, design tool, or editing software until you know exactly what you are creating and why. Skipping this phase is the single most common reason batching sessions go poorly — creators sit down without a plan and waste hours figuring out what to make instead of making it.
- Review your content pillars — These are the 3-5 core topics you consistently cover. Every piece of content should map back to one of them. If you do not have content pillars defined yet, stop and define them before you batch. Without pillars, you will create scattered content that confuses both your audience and the algorithm
- Check what performed well recently — Open your analytics from the past two weeks. What got the most engagement? What got the most saves? What drove the most profile visits? Create more content in that vein. Data should drive at least 50% of your ideation
- List your content ideas — Aim for 7-14 ideas depending on your posting frequency. Include a mix of content types: tutorials, stories, tips, opinions, behind-the-scenes, trending topics, and community-oriented posts. Variety keeps your content fresh and tests what resonates
- Assign each idea to a format — Video, carousel, single image, text post, poll, or Story. Decide now so you know what to create in the production phase. Mixing up formats also helps you test what your audience prefers
- Write out hooks and key points — Do not write full captions yet, just the hook line and bullet points for each post. This is the skeleton that makes the caption writing phase faster and more focused
- Map content to platforms — Some content works everywhere. Some is platform-specific. A 60-second tutorial might work on TikTok, Reels, and Shorts but not on Pinterest. A carousel might be perfect for Instagram and LinkedIn but not for X. Decide where each piece goes now
Keep a running note on your phone where you capture ideas throughout the week. Screenshots of things that inspire you, questions your audience asks in comments or DMs, trending topics in your niche, personal experiences relevant to your content pillars. By the time you sit down to batch, you should already have a bank of ideas to pull from rather than starting from a blank page.
Phase 2: Caption Writing (60-90 minutes)
Write all your captions in a single session. This is when you are in writing mode — not filming mode, not editing mode. Just writing. Having your hooks and bullet points from Phase 1 makes this dramatically faster because you are fleshing out a skeleton, not building from scratch.
- Start with hooks — Write the first line of every caption first. This is the most important line of any social media post because it determines whether someone stops scrolling and reads the rest. Writing all hooks in sequence also helps you avoid repetitive patterns — if you notice three hooks in a row start with "Did you know...," you can catch that and vary your approach
- Flesh out the body — Add the main value: tips, story, context, argument, or information. Keep the structure scannable — short paragraphs, line breaks, and bullet points work better on social media than dense walls of text
- End with a CTA — Every caption should tell the reader what to do next. Comment with their answer, save the post for later, share it with a friend, click the link in bio, or follow for more. Posts without a call to action consistently underperform those with one because they leave the reader with no direction after consuming the content
- Adapt per platform if needed — Instagram captions can run long and benefit from paragraph breaks. X needs to be concise and punchy. LinkedIn rewards storytelling with line breaks and personal narrative. Threads is conversational. Write the core version first, then make platform-specific adjustments. This is faster than writing separate captions from scratch for each platform
- Add hashtags and tags — Research and add relevant hashtags for each platform during this phase rather than scrambling for them during the scheduling phase. Having a saved list of hashtag groups for your content pillars speeds this up considerably
Most creators produce 15-25 captions per batching session. Advanced creators doing this regularly can knock out 40-50 once they get into rhythm. The first session will always be the slowest — your speed increases significantly after 3-4 batching sessions as the process becomes habitual.
How Do You Maintain Your Authentic Voice When Batch Writing?
One concern creators have about batch writing is that their captions might start sounding formulaic when written in sequence. This is a valid concern, and there are a few ways to guard against it:
- Vary your opening structures — Start some with questions, some with bold statements, some with personal anecdotes, and some with statistics. Deliberately rotating hook styles keeps your content feeling fresh
- Read each caption out loud — If it does not sound like something you would actually say, rewrite it. Your written voice should match your speaking voice as closely as possible
- Take short breaks between every 5-7 captions — A 5-minute walk or a glass of water resets your brain enough to prevent the "assembly line" feeling that creeps in during long writing sessions
- Pull from real conversations — If you had an interesting DM exchange or comment thread recently, use that energy and language in your captions. Real conversations prevent your writing from drifting into generic marketing speak
Phase 3: Visual Content Production (2-4 hours)
This is the most time-intensive phase, but batching it saves enormous time compared to setting up and tearing down equipment every day. The setup time alone — lighting, camera position, microphone, background preparation — takes 15-20 minutes each time you do it. When you batch, you do that setup once and film everything.
How Do You Batch Video Content Efficiently?
- Set up once — Lighting, camera or phone position, background, and microphone. Getting this right takes 15-20 minutes, and you only want to do it once per batch. Use tape marks on the floor or desk to remember your positioning so next session's setup is even faster
- Film all talking-head videos in sequence — Change your shirt between videos if you want them to look like they were recorded on different days. Some creators keep a small rack of 5-7 tops near their filming area specifically for this purpose
- Batch by location — If some videos are at your desk and others are in the kitchen, film all desk videos first, then move to the kitchen for all kitchen videos. Moving back and forth between locations wastes time and breaks your flow
- Do not aim for perfect takes — Film the full script, mess-ups included. You will edit later. Pausing to review and re-record each clip individually breaks your creative flow and adds hours to your session. Jump cuts are standard and accepted on every platform
- Film B-roll in batches — After your talking-head videos are done, film all the B-roll you need in one sweep: product shots, lifestyle clips, screen recordings, transition footage. B-roll that matches across multiple videos creates visual consistency in your content
- Record audio separately when possible — For voiceover content, record all voiceovers back-to-back. Your voice will be consistent in tone and energy, and the editing process is simpler when audio is a separate file
How Do You Batch Image and Graphic Content?
- Open your design tool once — Canva, Figma, Photoshop, or whatever you use. Create all your graphics in sequence without closing the application or switching to other tasks between designs
- Use templates — Design 3-5 branded templates and reuse them with different content. This creates visual consistency across your feed and cuts design time by 70-80%. Templates for carousels, quote graphics, tip posts, and announcement posts cover most needs
- Maintain a brand asset library — Keep your logo, brand colors, fonts, frequently used icons, and product photos in an organized folder. Hunting for assets during creation is one of the biggest time sinks in the design process
- Export all at once — Batch your exports at the end instead of saving individually throughout. Export in multiple formats if needed: square for feed posts, vertical for Stories and Reels covers, and horizontal for YouTube thumbnails or blog headers
- Photograph products in batches — If your content involves product photography, set up one photo shoot and capture all the images you need for 2-4 weeks of content. Change backgrounds, props, and angles to create variety from a single session
Phase 4: Editing (1-3 hours)
Editing is where batching delivers the biggest per-unit time savings. Editing one video takes significant time because you have to open the software, import footage, configure your settings, find your rhythm, and get into the editing mindset. Editing ten videos in sequence cuts the per-video time substantially because you stay in editing mode — your cuts become faster, your instincts sharpen, and the process feels automatic rather than effortful.
- Rough cut first — Go through all your videos and do rough cuts: remove dead air, mistakes, false starts, and irrelevant tangents. Do not add any effects, captions, or music during this pass. Just get the raw content to its essential form
- Add captions to all videos — Auto-captioning tools like CapCut, Descript, or Submagic process all your videos in sequence. Captions are no longer optional — the majority of social media users watch videos with the sound off at least some of the time. Videos with captions consistently see higher completion rates and engagement
- Apply effects and transitions — Keep these consistent across videos in the same batch for visual cohesion. Establish a standard set of transitions and effects that become part of your visual brand. This also speeds up editing because you are not making creative decisions for every individual video
- Color correct in batches — If your lighting setup is consistent (which it should be when you film in batches), you can apply the same color correction settings across multiple videos with minor adjustments. This creates a uniform look and saves significant time
- Export for each platform — Different platforms prefer different formats and aspect ratios. Export 9:16 vertical for Reels, TikTok, and Shorts. Export 1:1 square or 4:5 vertical for feed posts. Export 16:9 horizontal for YouTube long-form. Having all formats ready means you can publish to every platform without re-editing
How Do You Speed Up the Editing Process Over Time?
Editing speed improves dramatically with practice and systems. Here are techniques that experienced batch creators use to cut their editing time in half:
- Create editing presets — Save your most commonly used settings (color correction, text styles, transition types) as presets in your editing software. Loading a preset takes one click instead of manually adjusting every parameter
- Develop keyboard shortcuts — Learn and use keyboard shortcuts for your editing software's most common functions. The difference between mouse-clicking through menus and using shortcuts is significant over hours of editing
- Use project templates — Set up a template project file with your standard settings, aspect ratio, export configuration, and asset folders already in place. Duplicate this template for each batch instead of configuring from scratch
- Edit in order of complexity — Start with your simplest edits (talking-head with captions) and work toward more complex ones (multi-angle with B-roll and music). Your momentum and speed build throughout the session
Phase 5: Scheduling (30-45 minutes)
The final phase. Everything is created and edited — now you load it into your scheduling tool and set it live. This phase is where the entire batching effort pays off, because once you finish scheduling, your content runs on autopilot for the next week or two.
- Upload all media — Batch upload your images and videos to your scheduling platform. Uploading everything at once is significantly faster than uploading one piece at a time throughout the week
- Paste your captions — Pull from the document where you wrote everything in Phase 2. Having captions pre-written and organized by post number or date makes this a simple copy-paste operation
- Select platforms — Choose which platforms get which content. Some content works everywhere; some is platform-specific. A tool like cross-post lets you select multiple platforms per post and distribute from a single dashboard, which eliminates the need to log into each platform separately
- Set dates and times — Use your optimal posting times for each platform based on your analytics data. If your tool supports queue slots, just drop content into the queue and let it auto-publish at your predetermined best times. This removes the guesswork from every scheduling session
- Review and confirm — Quick scan through everything to catch typos, wrong images, missing hashtags, broken links, or incorrect platform selections. This final review takes 5-10 minutes and catches mistakes that would be embarrassing once published
- Set up engagement reminders — Schedule reminders for the first 30-60 minutes after each post goes live. Engaging with early comments boosts algorithmic distribution and shows your audience you are present, even when the content was created days ago
How Often Should You Batch Your Content?
The right batching cadence depends on your posting frequency, the complexity of your content, and how much uninterrupted time you can realistically block out. There is no single correct answer — the best cadence is the one you can maintain consistently.
| Batching Frequency | Best For | Time Required | Posting Output | Pros and Cons |
|---|---|---|---|---|
| Weekly | Most creators posting 3-7 times per week | 3-5 hours per session | 7-14 posts per session | Most common and sustainable; keeps content fresh and timely |
| Biweekly | Creators with unpredictable schedules | 5-8 hours per session | 14-28 posts per session | Fewer interruptions to other work; risk of content feeling dated by week two |
| Monthly | Creators with evergreen content types | 8-12 hours (full day) | 28-60 posts per session | Maximum time freedom between sessions; only works for content that does not require timeliness |
| Hybrid | Creators who mix evergreen and timely content | 2-3 hours weekly + monthly deep session | Varies | Best of both worlds; requires more planning but delivers the most flexibility |
What Is the Hybrid Batching Approach?
The hybrid approach is increasingly popular among experienced creators because it addresses the main weakness of pure batching: the inability to respond to trends and timely events. Here is how it works:
- Monthly deep batch — Once a month, create all your evergreen content: tutorials, how-to posts, educational carousels, tip lists, and anything that is not time-sensitive. This forms the backbone of your content calendar
- Weekly light batch — Each week, spend 1-2 hours creating timely content: responses to trends, commentary on industry news, community-oriented posts, and reactive content. This keeps your feed feeling current and human
- Daily engagement — Spend 15-30 minutes per day responding to comments, engaging with other creators, and managing your community. This is not batching — this is the ongoing relationship maintenance that makes your audience loyal
The hybrid model works because it gives you the efficiency of batching for the content that can be batched while preserving the spontaneity that keeps your account feeling alive and responsive.
What Tools Make Content Batching Easier?
The right tools reduce friction at every stage of the batching process. You do not need all of these — but having at least one tool for each phase makes the entire workflow smoother.
What Are the Best Tools for Content Planning and Ideation?
- Notion — Versatile workspace for organizing ideas, content calendars, and reference material. Database views let you filter content by pillar, platform, status, and date
- Google Sheets — Simple and free. A spreadsheet with columns for date, platform, content pillar, caption, media status, and posting status covers most planning needs
- Trello — Kanban boards work well for visualizing the content pipeline: Idea, In Progress, Ready to Edit, Scheduled, Published. Drag cards between columns as content moves through phases
- Apple Notes or Google Keep — For capturing ideas on the go. The best idea capture tool is the one you already have on your phone and will actually use
What Are the Best Tools for Content Creation?
- Caption writing: Google Docs or Notion for drafting all captions in one place. Having them in a shareable document also makes collaboration easier if you work with a team or editor
- Graphic design: Canva for most graphic creation needs — templates, carousels, Stories, and social graphics. Figma for more design-intensive work. Adobe Express for quick edits
- Video editing: CapCut for short-form video (free, powerful, and optimized for TikTok and Reels workflows). DaVinci Resolve for more advanced editing (free version covers most needs). Adobe Premiere Rush for mobile-first editing
- Auto-captioning: CapCut, Descript, or Submagic for adding captions to videos. Accuracy has improved dramatically and manual correction takes minutes, not hours
- Photography: Your smartphone camera with natural light handles most product and lifestyle photography. Lightroom Mobile (free version) for consistent photo editing with saved presets
What Are the Best Tools for Scheduling and Publishing?
The scheduling tool is the linchpin of the entire batching workflow. Without it, you have created all your content in advance but still need to manually publish each piece at the right time on each platform — which defeats much of the purpose of batching.
A cross-posting tool like cross-post lets you upload your batched content and schedule it across Instagram, TikTok, YouTube, X, Threads, Bluesky, and Pinterest from a single dashboard. Instead of logging into seven platforms and uploading the same video seven times, you upload once and select your platforms. This is where batching transforms from a time-saving technique into a time-multiplying one.
When evaluating scheduling tools, look for these features:
- Multi-platform support — The more platforms supported, the fewer tools you need
- Queue slots — The ability to set recurring time slots so you can drop content into a queue without manually picking dates and times each session
- Media upload — Support for videos, images, and carousels without file size headaches
- Draft saving — The ability to save partially completed posts as drafts to finish later
- Calendar view — A visual calendar showing what is scheduled and where, so you can spot gaps and balance your content distribution
What Are the Most Common Content Batching Mistakes?
Even experienced creators make mistakes that undermine their batching efforts. Recognizing these patterns helps you avoid them before they derail your workflow.
- Batching without a plan — Sitting down to create without knowing what you are creating leads to wasted time, creative paralysis, and mediocre output. Always complete Phase 1 (Strategy and Ideation) before touching any creation tools. The 30-60 minutes you spend planning saves hours of aimless work
- Overcommitting on your first session — Trying to batch a month of daily content in your first session is a recipe for exhaustion and disappointment. Start with one week (5-7 posts) and scale up as you refine your process. Your third or fourth batching session will be twice as fast as your first
- Ignoring real-time content entirely — Batching handles your planned content, but leave room for spontaneous posts about trending topics, timely events, or genuine in-the-moment experiences. An entirely pre-scheduled feed can feel robotic if there is never anything reactive or current mixed in
- Not having a system for capturing ideas — If you only brainstorm during your batch session, you will run dry by idea number six. Keep a running list of ideas throughout the week — from comments you receive, conversations you have, competitor content that inspires you, and questions your audience asks. By batching day, your idea bank should be overflowing
- Forgetting to engage after scheduled posts go live — Scheduling content does not mean abandoning it. The first hour after a post goes live is critical for algorithmic distribution. Set reminders to check comments and engage during that window, even though the content was created days ago
- Batch-creating without batch-reviewing — Before finalizing your batch, review all the posts together as a set. Are the topics varied enough? Are the hooks diverse? Is the visual feed balanced? A batch of seven posts that all cover the same subtopic or use the same visual template will feel repetitive to your audience
- Perfectionism during filming — Stopping to review every take, re-filming clips until they are flawless, and spending 30 minutes on a single 15-second video destroys your batching efficiency. Film everything with good-enough energy and fix imperfections in editing. The audience cares about the message, not whether you stumbled over one word
- Not adjusting your batch based on analytics — If your batched content consistently underperforms on certain topics or in certain formats, your next batch should reflect that data. Batching without analytics review becomes a cycle of repeating the same mistakes at scale
How Do You Batch Content for Multiple Platforms?
Creating content for one platform is straightforward. Creating for three, five, or seven platforms is where most creators feel overwhelmed. The solution is not creating entirely unique content for each platform — it is creating core content and adapting it efficiently.
What Is the Core Content Adaptation Method?
This method starts with creating one strong piece of content and then adapting it for different platforms based on their unique requirements:
- Create the core piece — This is your primary content: a 60-second video, a carousel, or a text post. Create it for your primary platform first
- Adjust the format — Export the video in 9:16 for TikTok and Reels, and in 16:9 if needed for YouTube. Resize the carousel for LinkedIn dimensions. These are format changes, not content changes
- Adapt the caption — Rewrite the caption for each platform's culture. Instagram captions can be longer and more storytelling-oriented. X needs to be concise. LinkedIn benefits from professional framing with personal narrative. Threads is casual and conversational
- Adjust hashtags — Each platform has different hashtag cultures. Instagram uses 5-15 relevant hashtags. TikTok uses 3-5 highly specific ones. LinkedIn uses 3-5 professional ones. X uses 1-2 or none. Research and save platform-specific hashtag sets for your content pillars
- Schedule with platform-specific timing — Each platform has different peak engagement windows. Schedule the same content at different optimal times for each platform
This method lets you maintain a presence across 5-7 platforms with roughly 30-40% more work than creating for just one platform — compared to 500% more work if you created entirely unique content for each.
What Content Can Be Cross-Posted Directly and What Needs Adaptation?
| Content Type | Cross-Post Directly | Needs Adaptation |
|---|---|---|
| Short-form vertical video | TikTok, Reels, Shorts (same video file) | Different captions and hashtags per platform |
| Carousels | Instagram to LinkedIn (with dimension adjustments) | Caption tone should shift for LinkedIn audience |
| Text posts | X to Threads to Bluesky | Character limits differ; expand or condense accordingly |
| Product photos | Instagram to Pinterest to Facebook | Pinterest needs keyword-rich descriptions; Facebook needs different CTAs |
| Behind-the-scenes video | Instagram Stories to TikTok | Story formatting differs from feed formatting |
How Do You Maintain Content Quality While Batching?
A common fear about batching is that quality will suffer when you produce a lot of content in one sitting. This is a legitimate concern, but it is solvable with the right approach.
What Are the Quality Control Checkpoints?
- Hook audit — After writing all your hooks, read them consecutively. Do they all start the same way? Are any of them weak or generic? Would each one make you stop scrolling if you saw it in your own feed? Be honest and rewrite any that do not pass the test
- Value check — For each post, ask: what specific value does this give the viewer? If the answer is vague ("it's interesting"), the post needs more substance. Every post should teach something, make someone feel something, or prompt someone to act
- Visual consistency review — Look at your visuals as a grid (the way they would appear on your Instagram profile, for example). Is there variety in colors, layouts, and composition? A batch where every graphic uses the same template with the same color will look monotonous
- Freshness test — Ask yourself whether each post would feel current and relevant if it published a week from now. If a post is only relevant today because of a trending topic, do not batch it — post it now or skip it
- Energy review — Watch your filmed videos in sequence. Does your energy stay consistent, or does it noticeably drop in the later videos? If your last few videos feel flat, re-record them at the start of your next filming session when your energy is highest
How Do You Get Started With Content Batching This Week?
You do not need to batch 30 pieces of content on your first try. Start small, learn the process, and scale up as it becomes habitual. Here is a practical first-session plan:
- Block out 3 hours on one day this week — Put it on your calendar as a non-negotiable appointment. Treat it like a meeting you cannot reschedule
- Plan 5 posts (30 minutes) — Choose your topics, assign formats, and write hooks and bullet points for each one
- Write 5 captions (30 minutes) — Flesh out your hooks and bullet points into complete captions with CTAs and hashtags
- Create 5 visuals or videos (90 minutes) — Film your videos, design your graphics, and capture your photos. Stay in production mode the entire time
- Schedule everything (30 minutes) — Upload to your scheduling tool, select platforms, set dates and times, and review before confirming. Using cross-post for this step lets you schedule across all your platforms at once rather than logging into each one individually
After your first batch session, evaluate what worked and what felt clunky. Which phase took longer than expected? Where did you get stuck? What would you do differently next time? Use those observations to refine your process for the next session.
What Does a Batching Schedule Look Like Over a Month?
Here is a realistic monthly view for a creator who posts 5 times per week across 3 platforms using weekly batching:
- Monday morning (3-4 hours): Strategy, ideation, caption writing, and scheduling for the week
- Tuesday morning (2-3 hours): Filming and editing all video content for the week
- Wednesday through Friday (30 minutes daily): Engaging with comments, responding to DMs, and creating any reactive or timely content
- Weekend: Off from content creation. Capture ideas if they come, but do not create or publish
This schedule means you spend roughly 6-8 hours per week on content and engagement — about an hour per day on average. Without batching, the same output would require 2-3 hours per day because of constant context switching, daily setup and teardown, and the mental load of deciding what to post every morning.
Frequently Asked Questions
How Many Posts Should I Create in My First Batch?
Start with 5 posts for your first session. This is enough to learn the process without feeling overwhelmed. After 2-3 sessions at this volume, you will naturally feel ready to increase to 7-10 posts per batch, and eventually to 14 or more as the workflow becomes second nature. Scaling gradually is important because jumping to high volume too fast leads to lower quality and burnout.
Can I Batch Content If I Create Mainly Video?
Yes, and video creators benefit from batching even more than image or text creators because the setup time for video (lighting, camera, microphone, background) is the most significant time investment you can eliminate through batching. Film all your videos in one session, then edit them all in another session. Many full-time video creators film an entire week of content in a single 3-4 hour filming block.
What If Something Happens That Makes My Batched Content Irrelevant?
This is a rare but valid concern. If a world event, platform change, or industry development makes a scheduled post inappropriate or irrelevant, simply pause or delete it from your schedule and replace it with timely content. This is one reason to always leave some flexibility in your posting schedule — never batch so tightly that there is zero room for real-time adjustments.
Does Batching Work for Stories and Ephemeral Content?
Stories can be partially batched. You can pre-design Story templates, write Story scripts, and prepare polls and question stickers in advance. However, Stories benefit from spontaneity more than feed posts, so most creators batch the structured elements (templates, branded Stories, tutorials) and create casual, in-the-moment Stories daily. A 70/30 split of batched versus spontaneous Stories works well for most accounts.
How Do I Stay Motivated During Long Batching Sessions?
Break your session into the five phases and take a short break between each one. Have your workspace prepared in advance so you do not waste energy looking for props, cables, or files. Play background music that helps you focus. And set a clear end time — knowing that you will be done by 2 PM, for example, creates a productive urgency that open-ended sessions lack. Some creators also find it helpful to batch with a friend or accountability partner, either in person or on a video call.
Should I Batch Content Weekly or Monthly?
Weekly batching is best for most creators because it balances efficiency with content freshness. Monthly batching works only if your content is entirely evergreen (tips, tutorials, educational content that does not reference current events or trends). If your content includes any timely elements — industry news, trending topics, seasonal references — weekly or biweekly batching keeps your feed feeling current. The hybrid approach (monthly deep batch plus weekly light batch) offers the best of both worlds for creators who want maximum efficiency without sacrificing relevance.
What Is the Biggest Time Saver in the Batching Process?
Templates. Having pre-built templates for your graphics, video editing projects, caption structures, and hashtag sets reduces the creative friction at every stage. Instead of starting from a blank canvas each time, you are filling in a proven framework with new content. Most experienced batch creators report that templates cut their total batching time by 40-50% compared to creating everything from scratch.
How Do I Batch When I Am Feeling Uninspired?
This is why the running ideas list from Phase 1 is so important. If you arrive at a batching session with an empty idea bank, the session will feel painful. Build the habit of capturing ideas daily — screenshots, voice memos, notes from conversations, questions from your audience. When batching day arrives, you should have more ideas than you need. If you are still feeling stuck, start with your easiest content type first. Momentum builds, and the creative block usually dissolves once you complete your first 2-3 pieces.
The Bottom Line
Content batching is not about creating content faster at the expense of quality. It is about creating content smarter by eliminating the inefficiencies that come from daily, fragmented production. When you batch, you spend less total time creating, produce higher quality work because you stay in focused creative modes, and free up the rest of your week for the things that batching cannot replace: genuine audience engagement, strategic thinking, and the rest of your life.
After your first batch session, you will immediately see why the most prolific creators swear by this method. The time savings compound — each session gets faster as you refine your process, build your template library, and develop the rhythm. And you will actually enjoy content creation more when it is concentrated into focused sessions instead of spread across every day of the week as an ever-present obligation.
Start with 5 posts. Block out 3 hours. Follow the five phases. Schedule everything. Then close your laptop and go do something else, knowing that your content is handled for the week.
Ready to simplify your social media?
Post to Instagram, YouTube, TikTok, X, Threads, Bluesky, and Pinterest from one dashboard.
Get Started Free →